How to Compress an Image to Under 100KB (2026 Guide)
Getting a photo under 100KB sounds simple until you actually try it. Shave off too little and the upload form still rejects your file; shave off too much and your photo turns into a blurry, blocky mess. The good news: hitting an exact size target is a solved problem, and with VisualConvert you can do it in seconds — privately, in your own browser, with nothing ever uploaded to a server.
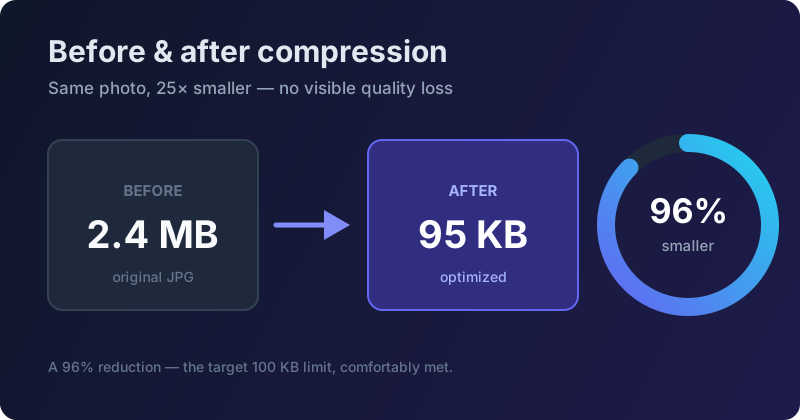 The same photo at 2.4MB (left) and 95KB (right). Can you tell the difference?
This guide walks through the exact process professionals use to compress any image to under 100KB while keeping it sharp — and, just as importantly, the common mistakes that quietly blow your file size back up.
Why 100KB is the magic number
All sorts of systems cap image uploads at 100KB: government portals, job-application forms, forums, older content management systems, and email signatures. It is a sweet spot — small enough to load almost instantly, but large enough to hold a genuinely usable photo.
There is an SEO angle too. Google's Core Web Vitals use loading speed as a ranking signal, and images are almost always the heaviest thing on a web page. Trimming every photo to the smallest size that still looks good is one of the highest-leverage speed improvements you can make. Whether you are fighting an upload limit or chasing a faster site, the technique is the same.
It helps to understand why photos are so large in the first place. A modern phone camera captures twelve megapixels or more — that is twelve million individual colour values per photo. Stored without compression, a single image would be tens of megabytes. Formats like JPG and WebP work by throwing away detail your eye cannot perceive, which is why a good compressor can shrink a file by 90% or more while looking identical. The whole game of hitting 100KB is deciding, intelligently, which detail to discard — and that is exactly what the steps below do in the right order.
1. Pick the right format first
Before you compress a single kilobyte, the format you choose sets your ceiling. The same photograph saved three different ways can differ in size by more than twenty times.
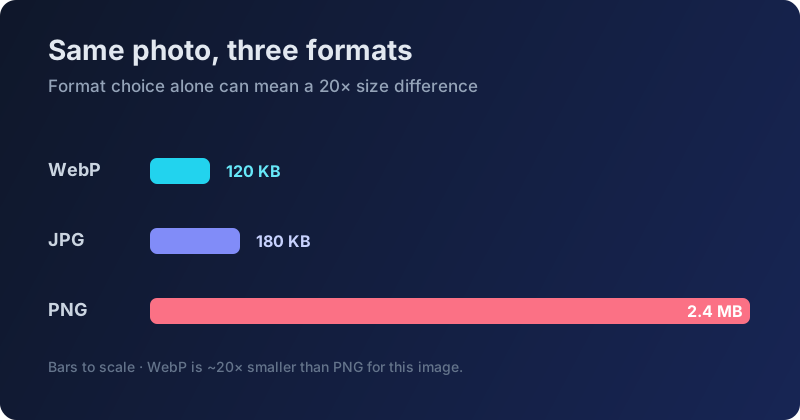 Format choice alone can mean a 20x difference in file size.
- JPG — the workhorse for photographs. It uses efficient lossy compression, has no transparency, and is supported literally everywhere.
- WebP — typically 25–35% smaller than JPG at the same quality. If the destination accepts it, converting from PNG to WebP is an easy win.
- PNG — brilliant for logos, screenshots and anything with sharp text or transparency, but a terrible choice for photographs. A PNG photo is often ten to twenty times larger than the same image as JPG.
The rule of thumb: if you are trying to squeeze a photo under 100KB, start from JPG or WebP. If you only have a PNG, convert it first — you will do half the work before compression even begins.
2. Resize before you compress
This is the step almost everyone skips, and it is the single most effective thing you can do. File size scales with the number of pixels, and pixels scale with the square of the dimensions. A 4000-pixel-wide photo has roughly four times the pixels of a 2000-pixel one and sixteen times that of a 1000-pixel one.
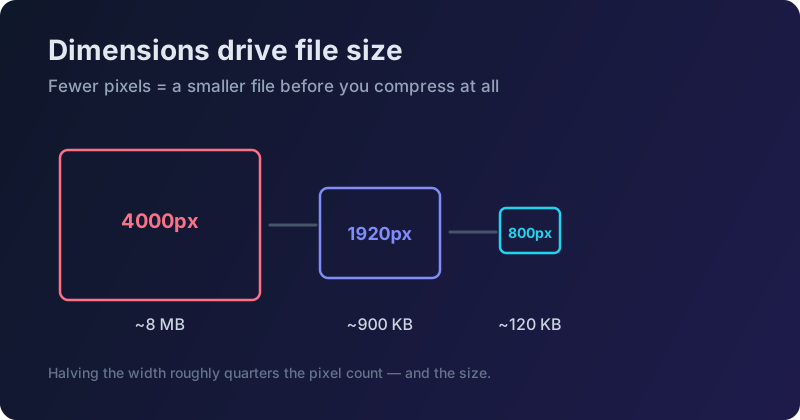 Resizing before compressing is the fastest way to shrink a file.
If your image will be displayed small, resize images down to that size first. There is no point serving a 4000-pixel photo into a slot that is only 800 pixels wide — you are shipping data the viewer will never see. Sensible target widths:
- Profile photo or avatar: 400–800px
- In-article image: 1200–1600px
- Full-width hero banner: 1920px
Resizing a 4000px photo down to 1920px will often get you most of the way to 100KB before you touch a quality slider, with zero visible loss because the extra pixels were never going to be shown.
3. Use exact-size (target KB) compression
Manually dragging a quality slider and re-exporting until the number looks right is slow and frustrating. The reliable approach is a compressor that runs a binary search on quality: it encodes the image, checks the size, and keeps halving in on the quality setting until the file lands just under your target.
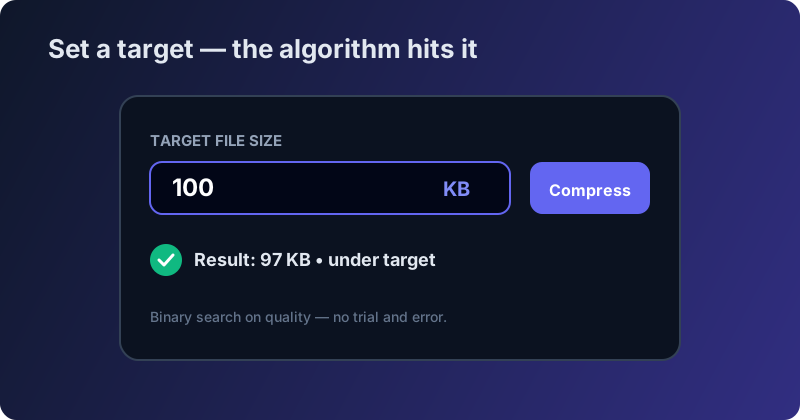 Set your target size and let the algorithm find the perfect quality.
With exact-size compression you simply drop in your image, type 100 in the target-size box (or 90 to leave a little headroom), and download the result. The output is guaranteed to be under your limit, and because everything runs locally your photo is private — it never leaves your device.
4. Verify quality at 100%
After compressing, always view the image at full size before you use it. Zoom to 100% and look at edges, skin tones and areas of flat colour — those are where compression artifacts show up first.
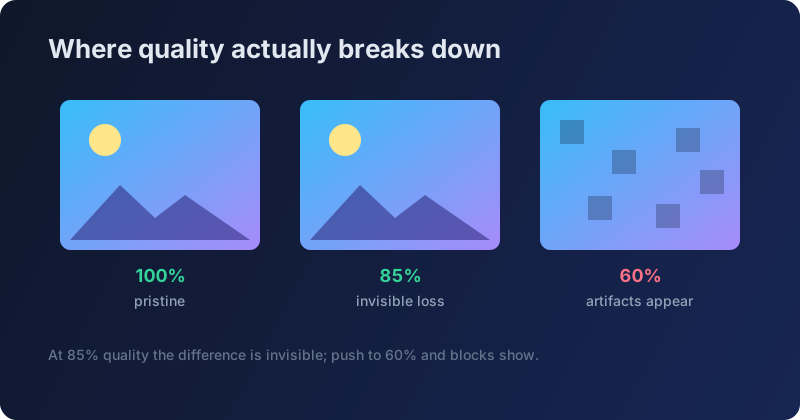 At 85% quality, the difference is invisible. At 60%, artifacts appear.
If you see blocky patches or a muddy look, you have two good options: resize the image a little smaller (fewer pixels means more quality budget per pixel), or switch to WebP, which holds detail better than JPG at very low file sizes. In practice, an 85% quality JPG at a sensible resolution is visually indistinguishable from the original for almost any photo.
Bonus: WebP buys you extra headroom
If your destination accepts WebP — most modern websites and content platforms do — it is worth trying WebP before JPG. Because WebP is roughly 25–35% more efficient, the same target size buys you noticeably higher quality, or the same quality at a smaller size. On a stubborn photo that will not drop under 100KB as a JPG without visible artifacts, re-encoding to WebP is often the difference between "good enough" and "genuinely crisp." The exact-size compressor works the same way for both formats, so it costs you nothing to test which one looks better at your target.
Common mistakes that blow up file size
Even people who compress images regularly fall into the same traps. Avoid these four and you will rarely fight the 100KB limit again.
Mistake 1: Starting with a PNG instead of JPG or WebP. PNG is lossless, so it refuses to throw away data — which is exactly what you want it to do for a photo. Trying to force a photographic PNG under 100KB is a losing battle. Convert to JPG or WebP first, then compress.
Mistake 2: Not resizing before compressing. If you skip the resize step and try to crush a full-resolution photo to 100KB with quality alone, you will push the quality so low that artifacts appear everywhere. Resize first; compress second.
Mistake 3: Trusting "Save for Web" blindly. Photoshop's legacy "Save for Web" is convenient but unpredictable — the same quality setting produces wildly different file sizes depending on the image, so you end up guessing and re-exporting. A tool that targets an exact size removes the guesswork entirely.
Mistake 4: Forgetting to strip EXIF data. Photos straight off a phone or camera carry embedded metadata — GPS location, device model, timestamps, and sometimes an embedded thumbnail. That can add tens of kilobytes and leak private information. Re-encoding the image (as any real converter does) drops that metadata, shrinking the file and protecting your privacy at the same time.
VisualConvert vs generic compressors: the exact-size difference
Most "image compressor" tools give you a single quality slider and leave the rest to you. You pick 70%, export, check the size, discover it is 140KB, drop to 55%, export again, and repeat. It works, but it is trial and error — and every round trip on a cloud tool means another upload and download of your private photo.
VisualConvert takes the opposite approach. Instead of asking "what quality do you want?" it asks "what size do you need?" Behind the scenes it runs a binary search: it tries a quality level, measures the encoded size, and intelligently narrows the range — high if the file is too big, higher quality if there is room to spare — until it converges on the best possible quality that still fits under your target. You get the sharpest image that meets your limit, on the first try.
Because the whole thing runs in your browser using the Canvas API, there are no uploads, no queues and no file-size caps from a server. You can compress images one at a time, or set an exact target and compress to under 100KB in a couple of clicks. It is faster, more private, and more precise than the guess-and-check workflow.
Real test: compressing a 4K photo to 100KB
Here is what the process looks like with real numbers. Start with a 4032 × 3024 photo straight from an iPhone — about 8.2MB as a HEIC, or roughly 6MB exported to JPG. That is nowhere near 100KB.
Step one, resize: scale the long edge down to 1920px. The pixel count drops by about three-quarters, and the file is now around 900KB — already a 7× reduction, with no visible change on any normal screen.
Step two, target compress: set the exact-size target to 100KB. The binary-search compressor settles on roughly 82% quality and produces a 97KB JPG. Zoomed to 100%, it is indistinguishable from the resized version. Total time: under ten seconds, entirely in the browser, with the original photo never leaving the device. Try it yourself on the homepage converter.
Your quick checklist
 Follow this checklist every time.
- Convert photos to JPG or WebP (never compress a photographic PNG directly)
- Resize to the dimensions you actually display
- Use an exact-size compressor set to ~90–100KB
- Verify the result at full zoom
Follow those four steps and you will hit an exact size target every time, with sharp results. Need to do a whole folder at once? Batch convert them together and download everything as a single ZIP.